
Planning a Multi-Brand Joint Booth: Three Companies Sharing One Booth at Automation Taipei 2026

Updated: 2 days ago
By Chris | Vision Design
The planning order for a multi-brand joint booth: first agree on the site's physical conditions and each company's zone, then design one overall form, and then make sure each company is seen in the area it is responsible for.
Below, using a booth shared by three companies at Automation Taipei 2026, we break down each step.
Key points: Questions of how to divide things, such as zones, storage rooms, and power, should be settled using a basis everyone recognizes, like floor area or each company's share of the booth fee, not left for on-site negotiation. In the design, set one shared color palette and material system first, then let each company be seen on its own side.

Why Multi-Brand Joint Booths Exist
Exhibiting jointly is usually a deliberate choice. By combining their space, several companies can secure a larger booth in a better location and share the space and costs.
The trade-off is that the design has to answer two things at once: every company has to be seen, and the whole has to look like one booth. Combining also does not reduce the administration and engineering; much of it still has to be handled company by company.
Project Background: Automation Taipei 2026

Show dates: Aug 19–22, 2026, Taipei Nangang Exhibition Center, Hall 1; move-in Aug 17–18
Booth: an island booth on the ground floor of Hall 1, open on all four sides
Exhibitors: three technology companies, one of which is also the distributor for an overseas brand
Roles: one of the three acted as the main point of contact, and we managed the model and all drawings centrally
Step 1: Check Physical Conditions First, Then Discuss Zoning
An island booth is seen from all four sides, which also means all four sides may run into venue facilities.
Before starting, we checked column positions in the organizer's booth system, then fire service pipes, gas valves, and smoke vents, and then measured the columns' setting-out dimensions. Every wall afterward was based on those figures.
On the ground floor of Nangang Hall 1, fire alarm panels, extinguishers, and sprinkler valves sit on the north side of the columns, and they must be left exposed through openings when the column is wrapped. The existing partitions around the columns follow the exhibitor manual's dimensions; on our drawings we enlarge the column wrapping slightly to leave a construction tolerance.
An accurate drawing does not guarantee it will fit on site.Client floor plans are usually conceptual. We follow each company's layout as closely as possible, and explain in advance which areas need adjusting to buildable figures, so the gaps are not discovered on site.
Step 2: Dividing the Space and the Storage Rooms
Storage rooms are a common point of tension in joint booths. In this project, storage room sizes wereallocated in proportion to each company's share of the booth fee. It was a basis all three could accept, and it saved a round of discussion.
Walls are shared wherever possible. Closing off the outer side of one company's storage room turned it into a wall of another company's storage room: one wall serving two companies, saving material and labor.
Adding a wall between two zones also made it possible to leave out a post that would otherwise have been needed there. Long continuous walls must also have openings to keep escape routes clear; this is a hard requirement of the organizer's regulations.
Backing is decided face by face: surfaces visitors can see get a double-sided finished back, and surfaces visible only from inside a storage room get a single-sided backing. Double-sided means twice the panels and surface treatment,so deciding face by face keeps the quote accurate.
Step 3: One Overall Form, Three Companies Each Seen
The design brief for the three-company booth was "unity within distinction": not forcing three companies into one identical face, and not letting three zones become a patchwork either.
We first extracted the color palettes from all three logos, so each zone could be told apart while the whole stayed unified. Every material extended from this palette.

The header sits high and is visible from far away, making it the main place for brand exposure. So each company had its own logo position on the header, large and clear enough to read.
A distributor client adds another layer of hierarchy. The company representing an overseas brand showed both its own brand and the distributed brand in its zone, weighted as primary and secondary, and the distributed brand's identity color had to be considered together with the overall color scheme.

Material tone was also set per company. One company preferred wood grain, so its zone used a higher proportion of wood grain.
Step 4: Administration and Power Are Handled Company by Company
On the organizer's side, a joint booth is still three exhibitors, and the application forms are filed one company at a time. The three did not necessarily need the same set of forms: one had an extra application that another did not, so the paperwork could not simply be copied.
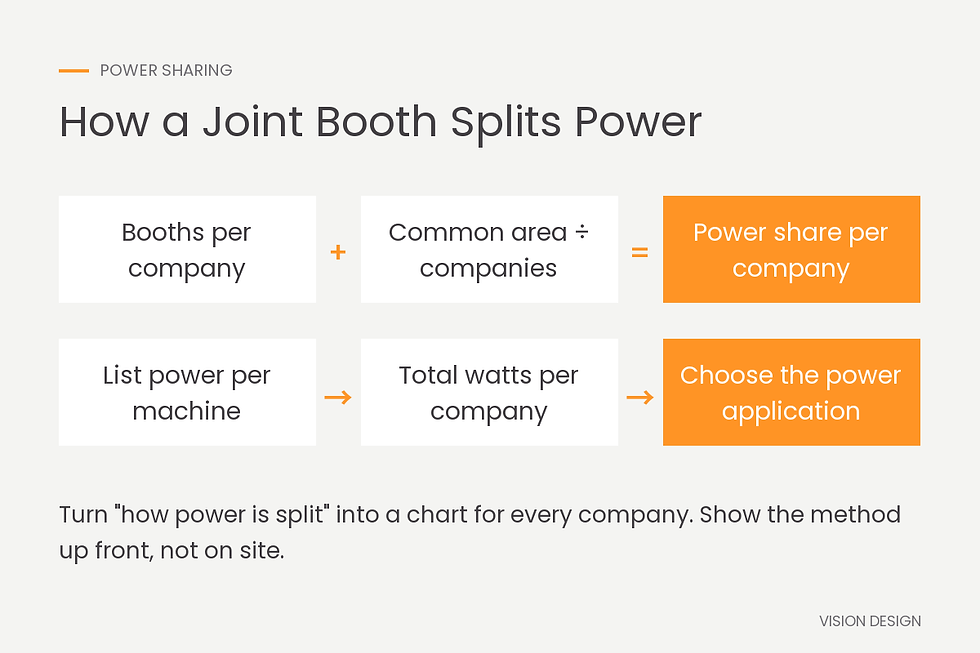
Power was allocated from the floor plan: first count the standard booths each company uses, then divide the shared areas (shared aisles and common zones) by the number of exhibitors to get each company's share. Next, list the power for each machine, total the wattage, and then decide the combination to apply for.
We turned "how the power was divided" into a chart for all three companies, so the allocation was out in the open.
Client change requests were managed separately by company. It is normal for each company to reply at a different pace; whoever replies first gets their changes made first, with no need to wait for the others.
Step 5: Move-In Sequence
This booth had a custom-built main structure, with the modular system used only for the lower cabinets. On the first move-in day (Aug 17), materials arrived at 09:10, before any graphics or veneer; at 09:14 the carpenters set out the wall and floor positions, which located the overhead beam.

Next came electrical wiring, joining the backdrops, and raising the central feature wall. Most of the overhead beam's surface was finished on the ground first, and the joints were closed after it was lifted into place.
The order is structure, electrical, filling, graphics.Graphics come late in the sequence and are often the bottleneck, so all three companies' posters and artwork had to be final before move-in.
Five Things to Confirm Before Planning a Joint Booth
Who the main point of contact is, and whether one party manages the model and all drawings
The basis for allocating each company's zone and storage room (floor area or share of the booth fee)
The extent of shared walls, shared zones, and common aisles
Whether each company's power needs and machine specs are complete
The brand hierarchy among the companies and where each logo appears
FAQ
Q1: Does a joint booth have to use one style?
Not one style, but one shared foundation. Our approach is to set a shared color palette and material system first, then let each company keep its identity in its own zone. From a distance it reads as one booth; up close you can tell it is three companies.
Q2: How can storage rooms and costs be divided with the least dispute?
Use a basis everyone recognizes, such as each company's share of the booth fee or the number of standard booths it uses. In this Automation Taipei 2026 project, storage rooms were allocated by booth-fee share, power by number of standard booths, and shared areas split evenly among the three.
Q3: Can one company submit the organizer applications on behalf of all?
One company can be the point of contact, but organizer applications usually still have to be filed company by company, and each may need a different set of forms. Actual requirements follow that year's exhibitor manual.
Q4: Does a joint booth take longer to build?
On-site work is the same as for a single-brand booth. The difference is up front: zoning, shared walls, and power allocation all need each company's sign-off. The earlier these are confirmed, the simpler move-in becomes.
Related Projects
Automation Taipei 2026 joint booth project
Related services: Custom-Built Booth Design & Build, Modular System Booth Planning & Build
Further reading: Building a Booth at Taipei Nangang Exhibition Center, What to Submit for Organizer Review, Custom-Built or Modular System Booth?


Comments